
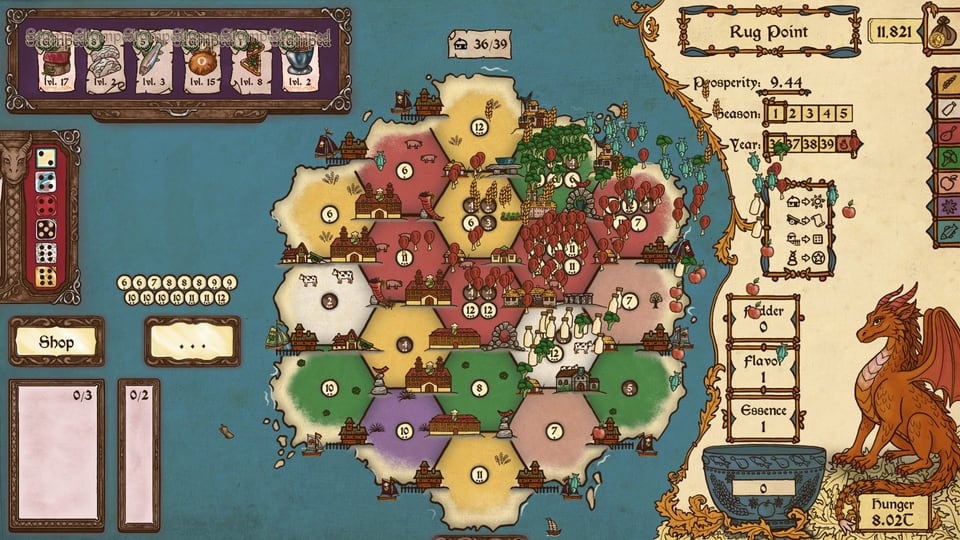
Patch 1.01 (September 3)
The first-week note promised a balance-and-bug patch. That patch is live as 1.01. Early-game hunger is lower so the opening years have more room to find a plan; the developer says the later challenge is meant to stay. Starter flavor recipes (Ketchup, Pea Soup, Lutefisk and similar) were buffed for those first years. Tile tooltips now show expected harvest from the current Marks, and calendar bricks mark when you get new building slots.
Starter buildings now sell for 0. Ducat recipes lose all stamps after use. Hubris Hanger attacks were accidentally off and can happen again, including after year 100. Blessing die, Farmageddon last-season softlock, a rare harbor crash, profile reset and high-score recording are listed as fixed. Official notes still do not publish exact hunger numbers, so the loop below stays the same — just expect the opening years to be less punishing.
Patch 1.02 and 1.021 (September 13–14)
1.02 “Who Let the Dragons Out?” is a content patch, not just fixes. Seven new small flying dragons now fly over the map and fight the sea snakes — previously only the Baron did, which looked wrong when you were playing another dragon.
Other additions and changes in 1.02:
- A small tooltip appears next to recipes and dice that target a specific value (Eintopf, Umami and similar).
- Recipes in the tray now keep the order you activated them in.
- The secret minigame now accepts Space to feed.
Bugfixes
- The Temple’s ducat bonus now applies to the buildings it was missing.
- The harvest-expectation tooltip is removed from Feeding Grounds.
- Accidental shop-selection lock is less likely.
- Fixed gamepieces autoselling on rare occasions, plus translation fixes.
Balance
- Buckets of Ducats achievement ducat requirement lowered to 100,000.
- Mason’s Moorings is much more likely to appear in the shop if you do not own one.
- Temple bonus 8 → 10 ducats; Altar bonus 20 → 30 ingredients; Casino bonus 3 → 4 ducats per unused dice roll; Tollhouse bonus 2 → 4 ducats per adjacent Farmstead.
- Base ingredient yield for Windmill, Pasture, Ranch, Garden, Orchard and Plantation increased from 50 to 70.
- Long Summer card cost 3 → 4 points; Divination card cost 3 → 2 points.
The yield change and the building-bonus increases make the mid-game economy meaningfully softer than the 1.01 numbers, so treat pre-1.02 income estimates as low.
1.021 (September 14) is a small hotfix: it fixes a graphical issue with the new value tooltips for recipes and dice, includes music tweaks, and notes that music compression changes mean the update downloads extra data.
The short version
Feed the Scorchpot is a twenty-year engine-building run. You roll dice, keep useful faces, turn every pair of kept dice into a Mark, harvest tiles activated by those Marks, then cook the haul for the dragon. The official press kit describes the game as a tabletop roguelike built around farms, shrines, harbors, recipes and custom dice.
Officially confirmed: the release version launched August 20, 2026 on PC/Steam. The publisher lists 50+ buildings, 80+ recipes and 20+ dice types.
1. Think in Marks, not individual dice
A common beginner mistake is staring at one die at a time. The board listens to sums of pairs of kept dice. If you keep 6, 5, 1, you create Marks 11, 7, 6. With three dice there are three pairs. With four dice there are six pairs.
This makes placement and dice planning inseparable. Before locking a die, ask: which pairwise sums does this create, and do those sums wake tiles beside my important buildings?
Use our Marks & Dice Calculator to preview this quickly.
2. Your first buildings should form an engine
Farmsteads collect ingredients from adjacent activated tiles. Trade posts can turn adjacency into Flavor and economy. Harbors interact with coastal tiles and are part of the route toward a larger dice tray. Shrines amplify nearby production and support more rolling capacity.
Do not scatter buildings just because a single tile looks attractive. Clusters are easier to amplify. The tutorial footage repeatedly emphasizes adjacency: the value of a trade post or shrine is defined by what touches it.
3. Raw Fodder is not enough
Your meal is built from multiplicative layers. Supplied tutorial footage describes the scoring structure as Fodder × Flavor × Essence, while the official press kit says recipes boost Flavor and Essence to multiply the Fodder score into large totals.
Early on, raw ingredient production can look impressive while the final meal remains weak. If you have enough Fodder to survive but low multipliers, spend toward Flavor, recipe access or a useful adjacency bonus rather than buying yet another low-impact producer.
4. Finish a year early when it is safe
Gameplay footage shows spare seasons feeding Prosperity, which then improves future scoring. That creates a snowball: a clean early year can make later years easier. But do not throw away a safe meal just to chase one more shop purchase or a greedier roll.
Video-tested strategy: early completion is valuable because spare seasons can build Prosperity. Exact growth values seen in old footage may differ by version, so this guide avoids hard-coding them.
5. Aim for the major capacity breakpoints
The most important early progression is not a single recipe. It is expanding what a season lets you do: more seasons, more recipe slots, more dice, and more roll opportunities. Supplied gameplay consistently shows the fourth die and second active recipe slot as major power jumps.
A fourth die increases pairwise combinations from three to six. A second recipe can let two effects interact in the same cook. Those are structural upgrades, not small stat bumps.
A safe first-run priority
- Place the first farmsteads where multiple useful Marks overlap.
- Buy a recipe you can actually activate with your current ingredient plan.
- Use adjacency buildings to add multipliers or economy rather than spreading randomly.
- Work toward the building milestones that expand seasons, recipe slots, dice slots and rolls.
- Once Fodder is comfortable, invest in Flavor/Essence and consistency.
- Keep enough money or tools to recover from a bad year or scorched part of the board.
- Finish the annual hunger requirement before getting greedy.
What not to memorize yet
Do not memorize exact beta costs, old recipe numbers or demo-only unlocks. The game changed across demo, beta and launch. Learn the relationships first: Marks activate the board; adjacency builds the engine; recipes and advanced effects multiply the meal; capacity upgrades make the engine more consistent.
Sources and evidence
- Feed the Scorchpot publisher press kit — current official facts and feature counts.
- Feed the Scorchpot on Steam — current store and release information.
- Our evidence policy and supplied gameplay sources — includes version caveats for demo and beta footage.